Nov2017
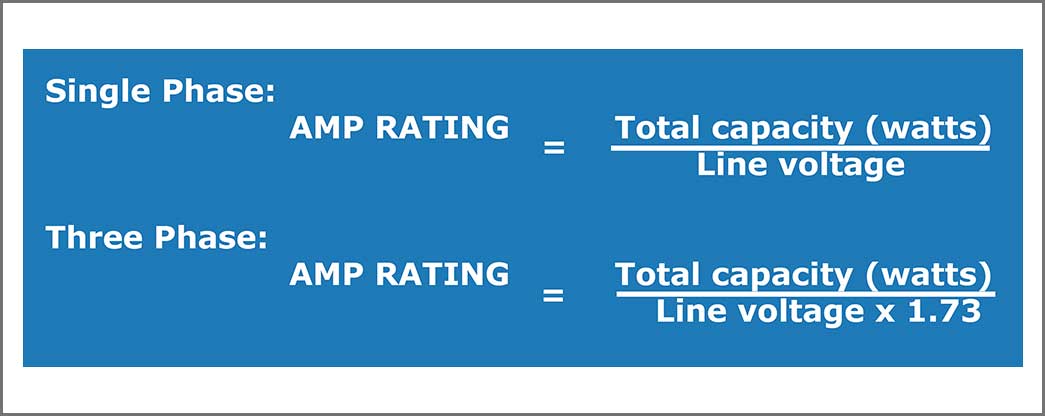
Shut off/lockout our control power. Make sure that your control is sized for your heater load. See the formula below for a guideline.
Locate the contactor (CN1), ground terminal and terminal block inside the control. Knockout a hole to pull your heater wires through.
Prepare your heater wires. When wiring in the connections make sure the wire is stripped to the appropriate length so that the connections are compressing on the wire strands and not the insulation. Make sure that no wire strands are extending outside of the terminals.
The first connection will be your green ground wire to the ground terminal. This is a cage clamp connection.
To make this connection, use a small flat head screwdriver, press down into the hole above the terminal until you feel a slight give. You will then be able to insert the prepared wire end into the terminal. Once fully inserted, remove the screwdriver.
Test the connection by pulling on your wire to make sure it is securely set in the terminal block.
Next, connect the heater power wires to the bottom of the contactor to terminals T1, T2 and T3. For single phase power, use T1 and T3 only.
Make sure the wires are properly tightened.
The final wiring connection will be the heater overtemp protector wires. This connection will go into the terminal block # 4 and 5 labeled Heater TCO. Follow the same procedure for cage clamp connections as above.
Make sure the wires are properly tightened.
This completes your heater wiring.
TO VIEW A VIDEO ON HOW TO COMPLETE HEATER WIRING, CLICK HERE!.
Shared December 6th, 2017
By Connie Dawson, Process Technology